How to Make Freeze Dried Sweets at Home?
In recent years, Freeze Dried Sweets have gained popularity among home chefs and dessert lovers. According to Dr. Emily Winters, a leading expert in freeze-drying technology, "Creating freeze-dried sweets at home allows for unique flavors and textures." This method captures the essence of your favorite treats while intensifying their sweetness.
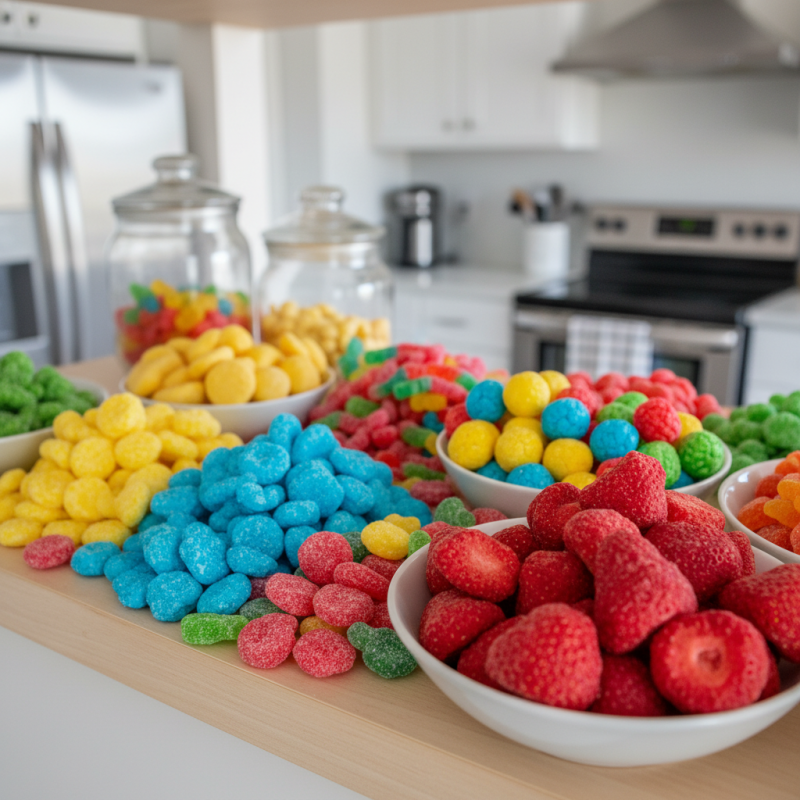
The process of making Freeze Dried Sweets might seem daunting. Yet, with the right techniques and equipment, anyone can succeed. Imagine transforming strawberries into crunchy, flavorful bites. Visualize the bright, intense colors of freeze-dried candies lined up on a shelf. However, it’s essential to approach this method with care—overdoing the freeze-drying can create hollow or overly crispy results that aren’t appealing.
Experimentation is key here. Not every attempt will yield perfection. There may be batches that do not turn out as expected, leading to frustration. Yet, with each failure, you learn and refine your methods. With patience and practice, your skills will improve, allowing you to create delightful Freeze Dried Sweets that impress family and friends alike.
Understanding Freeze Drying: The Science Behind the Process
Freeze drying is an intriguing process. It removes moisture from food while preserving taste and texture. The key lies in sublimation. This means turning water from ice directly into vapor without becoming liquid. Understanding this process helps in making delicious freeze-dried sweets at home.
To start, choose your ingredients wisely. Fruits often work best. Berries, bananas, and apples can transform beautifully. Make sure they are ripe. Cut them into uniform pieces for even drying.
Tips: Always pre-freeze your food. This step is crucial. It prepares the ingredients for better moisture removal later. Monitor the temperature carefully during the process. Too high temperatures can ruin the texture.
Pay attention to the time required for freeze drying. It may take longer than expected. Rushing through can lead to ineffective results. Test a few pieces before freezing large batches. They may not come out perfectly at first. Learning through practice is part of the journey.
Essential Equipment for Homemade Freeze Dried Sweets
Creating freeze-dried sweets at home can be an exciting and rewarding process. To start this journey, you’ll need some essential equipment. A freeze dryer is the most important tool. It removes moisture from food while preserving flavor and nutrients. However, these machines can be expensive and take up considerable space. Consider if it fits into your kitchen setup before purchasing one.
Next, vacuum seal bags are necessary. They help store your freeze-dried sweets for long periods. Ensure they are of high quality to avoid air and moisture getting in. Some may find sealing challenging at first, but practice makes perfect. A good kitchen scale is also vital for measuring ingredients accurately. This can avoid imbalances in sweetness or dryness.
Don’t forget about trays. Using stainless steel or silicone trays can make a difference in the final texture. Experimenting with different ones might yield varying results. Remember, perfection is subjective. Sometimes things won’t turn out as expected. That’s okay. Reflect on what went wrong and try again. The journey of learning is part of the fun.
Freeze Dried Sweets Production Overview
Step-by-Step Guide to Preparing Ingredients for Freeze Drying
Freeze drying can be a fun and rewarding process. Start by choosing your favorite ingredients. Fresh fruits like strawberries or bananas work well. Consider vegetables too, like carrots or peas. Aim for high-quality items. Inspect them closely; any blemishes can affect the final product.
Next, rinse and prepare the ingredients. Wash fruits thoroughly to remove dirt. Peel and slice them into uniform pieces. This step matters. Uniformity helps ensure even freeze drying. Vegetables may require blanching. Boil them briefly, then cool in ice water. This might seem tedious, but it preserves color and nutrients.
Once prepared, place your ingredients in the freeze dryer. Spread them out evenly. Overcrowding can lead to uneven drying. Keep an eye on them during the process. It takes time, and you might feel impatient. But patience is key. Check consistency before storing them. They should be crisp, not chewy. This process may require some trial and error, but it's worth it in the end.
How to Make Freeze Dried Sweets at Home? - Step-by-Step Guide to Preparing Ingredients for Freeze Drying
| Ingredient | Preparation Steps | Freeze Drying Time | Tips |
| Fruits (e.g., strawberries, bananas) | Wash, slice into uniform pieces. | 6-12 hours depending on thickness. | Ensure slices are even for consistent drying. |
| Marshmallows | Place whole or slice into pieces. | 5-10 hours. | Keep them separate to avoid sticking. |
| Chocolate (in small pieces) | Melt and pour into molds to set. | 8-24 hours. | Avoid overheating chocolate during melting. |
| Yogurt Drops | Drop spoonfuls onto parchment paper. | 6-12 hours. | Use flavored yogurt for varied taste. |
Tips for Packaging and Storing Freeze Dried Sweets
When making freeze-dried sweets, packaging and storing them properly is crucial. Use airtight containers to keep moisture out. Glass jars or vacuum-sealed bags work well. Label each container with the date and type of sweet. This way, you can track freshness easily. Avoid using plastic bags that may trap moisture. They can ruin the texture and flavor of your sweets.
Storing freeze-dried sweets in a cool, dark place prolongs their shelf life. Avoid direct sunlight and heat sources. An ideal location is a pantry or a cupboard. Check regularly for any signs of moisture. If you see condensation, transfer the sweets to a dry container immediately. It’s easy to overlook this, but moisture can lead to spoilage.
Don’t forget to consider portion sizes when packaging. Small portions are easier to manage and reduce exposure to air. Using different sizes helps with organization. Track what you open. It’s a learning curve, but these small steps keep your freeze-dried sweets delicious for longer.
Creative Recipe Ideas for Freeze Dried Treats at Home
Freeze drying sweets at home can be a fun adventure. You can start with fruits like strawberries or bananas. Slice them thin. Spread them out on a tray. Make sure they are not touching. Next, it’s time to freeze them. A regular freezer works, but a deep freezer gives better results.
Once frozen, it’s time for the magic. A vacuum chamber is essential for this step. When you remove air pressure, the frozen water turns into vapor. This process can take several hours. Remember, it’s crucial not to rush this step. If you do, your treats might not turn out well.
Experiment with different sweets. Try making freeze dried gummy candies or marshmallows. You might find the texture surprisingly different from fresh versions. However, not all treats freeze well. Some might lose their flavor. It’s worth considering which sweets to try. The process can be messy, and results may vary. So be prepared for a bit of trial and error!


